In a previous episode, we set up Python for development like a Boss.
In this one, I’ll show you how to set up your local machine for nodejs development so you can get started with node today. Let’s go!
Requirements
- Ubuntu 20.x / WSL
- Internet connection
nvm (node version manager)
Similar to Pyenv for python, nvm is a program that allows us to manage multiple versions of node and makes switching between versions in different projects as seamless as it can be.
Let's install nvm following their instructions on Github. Make sure you check Github to install the latest version if you're reading this from the future! Open up your terminal and run this command to install nvm.
curl -o- https://raw.githubusercontent.com/nvm-sh/nvm/v0.38.0/install.sh | bashThis will download nvm, install it locally, and add some lines to your .bashrc (or .zshrc) and will tell you something like "restart your terminal to apply". So let's restart the terminal.
To verify that nvm is installed correctly, run this
command -v nvmYou should see that it prints nvm if it's working. If not, follow the troubleshooting guide.
Now, we can install nodejs using nvm. Let's get the latest version by running:
nvm install node # "node" is an alias for the latest versionYou should see some output ending like this
...
Now using node v16.1.0 (npm v7.11.2)
Creating default alias: default -> node (-> v16.1.0)
Installing other versions
The whole point of using nvm is that we can manage multiple versions of node. This is important because you might have some apps that require a specific version, while you can also test new features when a new version is released without messing with the previous versions required for other projects. In the previous step, we downloaded the latest version of node but it's recommended to stick with the Long Term Support versions for stability and long-term updates. This is what you want for apps you plan to maintain for a long time.
nvm install --ltsThis installed v14.17.0 for me today. Since this is the latest LTS version, I will also go ahead and tell my system to default to using this for every new shell.
 nvm alias default 14
 # default -> 14 (-> v14.17.0)
If I now run nvm ls, it will show me all my installed versions along with other available versions.
Now, my system is set up to use the LTS version that I just installed, but for newer projects where I'd like to try more recent features added to nodejs, I want to use the latest version available. We can achieve this by creating a .nvmrc file in the project root directory (or any parent directory) to tell nvm which version it should use for this particular project.
mkdir ~/src/nodeproj
cd ~/src/nodeproj
echo "node" > .nvmrc # to default to the latest version
Now if I just run nvm use, it'll look for that .nvmrc and switch to whatever it says in there that it should use.
If you'd like, you can also set up nvm to automatically switch versions based on the local .nvmrc file (without having to enter nvm use manually). To do that, follow the official guide here.
Bonus: yarn package manager
We are now done with the node part. That was easy, right? But node wouldn't be what it is without its robust ecosystem of packages. The node maintainers support the official npm package manager which ships with every version of node. However, more recently Facebook introduced yarn to optimize package resolution, offline support, and reproducible builds. And it's very fast! On average, about 4x faster than npm.
To use yarn, you just need to run one command to install it via npm (oh the irony...)
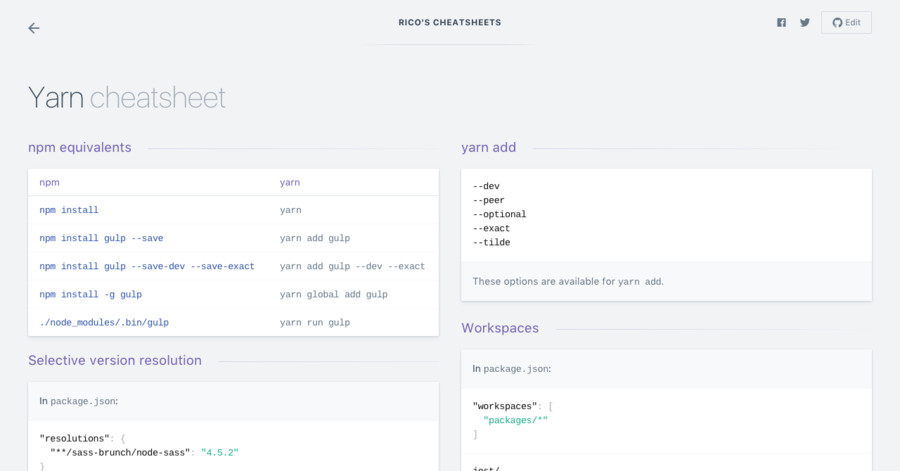
npm install -g yarnYou can use yarn to install packages just like you would use npm. There are only minor differences in the syntax of the commands like yarn add as opposed to npm install and a few others. To help you get used to it, here's a handy yarn cheatsheet for ya!

And that's all you need to start playing with nodejs today. Go write some code!
Have other nodejs tips for getting started? Please let us know in the comments below!


